Access Your Remote Server as Localhost Using SSH Tunneling
By Daniel Laufenberg on 12/29/2024

By Daniel Laufenberg on 12/29/2024
If you have deployed software in the past, you know that anything you host on a remote server is not directly accessible from your computer. You would usually need to RDP into the server or connect to the server via SSH, as we should. There are many obvious reasons why you would not want to directly connect your computer to the deployment server, most notably for security reasons.
But what if there were a way to connect to a remote server in such a way that it feels like you are connecting to a local system on your computer? We can create this behavior using SSH tunneling.
SSH tunneling allows you to securely forward a port from a remote server to your local machine over an encrypted SSH connection. This means you can access services running on the remote server as if they were available on your own computer. Instead of exposing these services to the internet, which would introduce security risks, SSH tunneling keeps them protected behind a secure channel accessible only to you.
Let's look into how we can achieve this with a virtual machine hosted on AWS.
Let's spin up a CouchDB instance using AWS EC2 and connect to it via localhost.
Access the AWS Management Console using your account credentials. This is where you will configure and manage your EC2 instances.
Navigate to the AWS Marketplace Bitnami CouchDB package and launch a pre-configured CouchDB instance. This saves you the time and effort of installing all dependencies manually.

You can choose any configuration you want to try, but for this demonstration, the cheapest virtual machine will suffice.
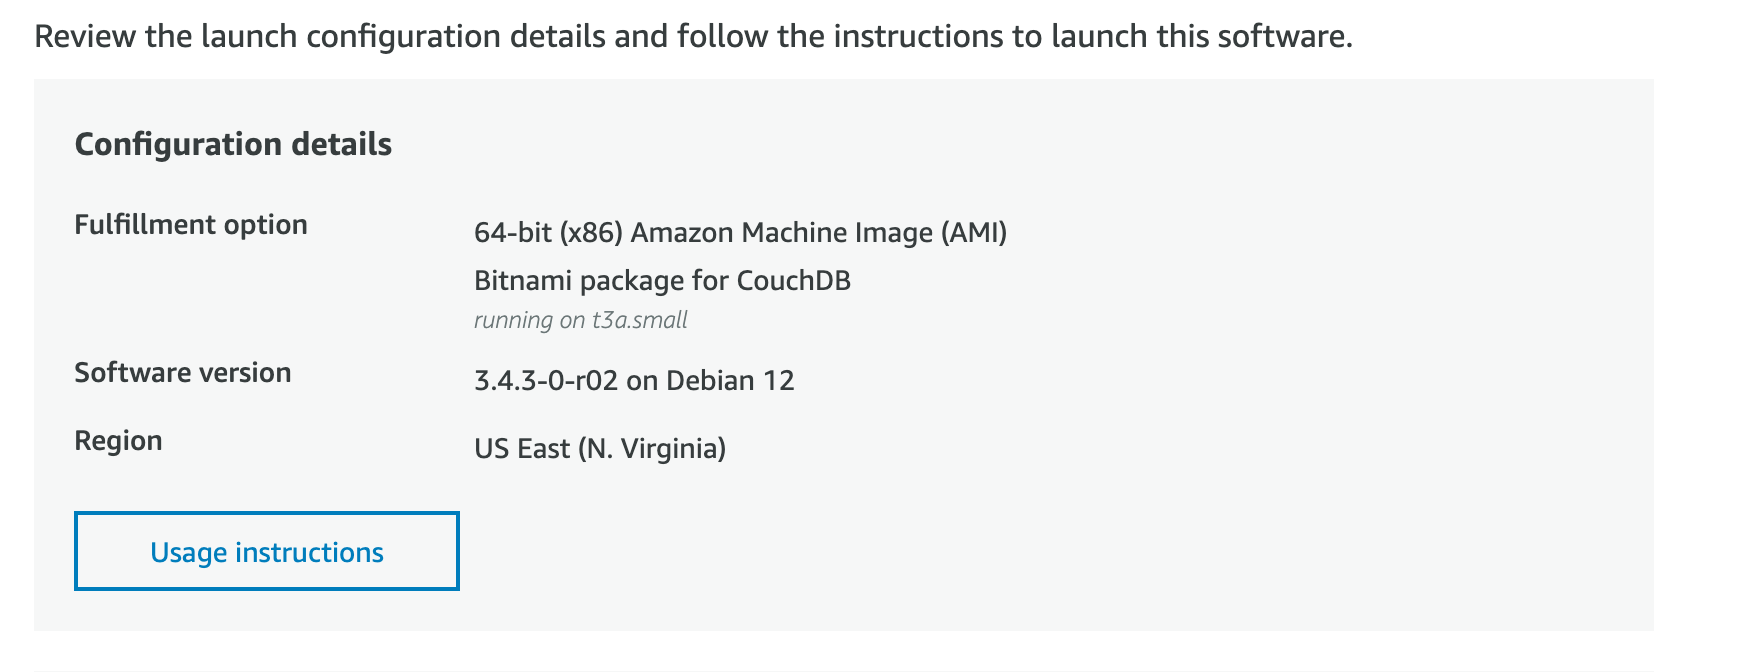
Key Pair Settings: Make sure to either generate a new key pair or use an existing one that is available and configured.
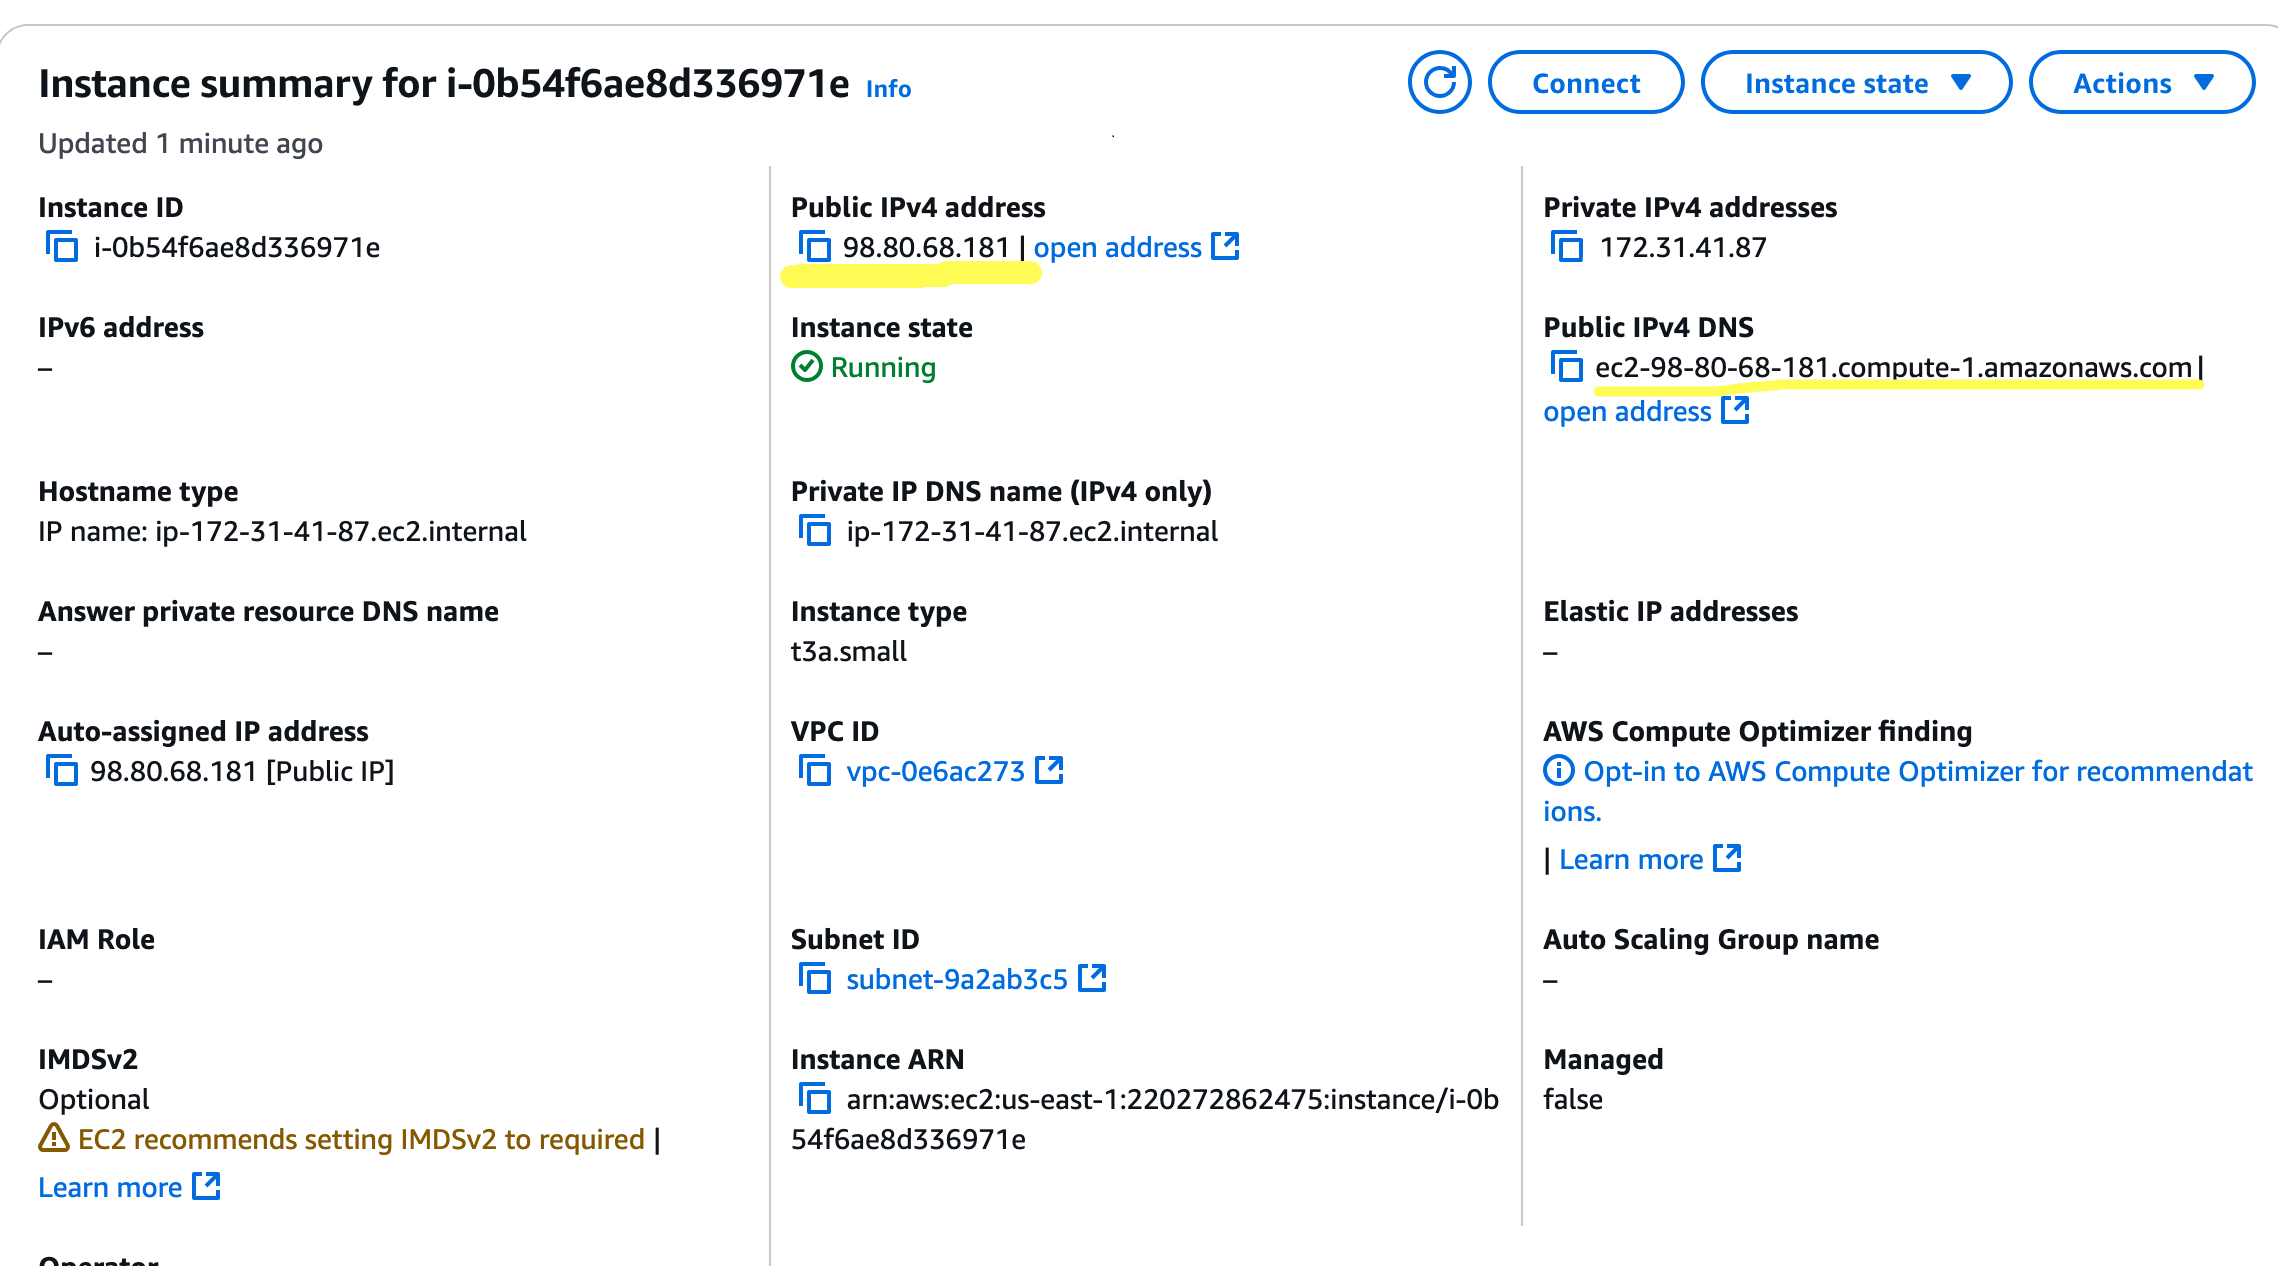
Once your instance is running, take note of the public IP address or public IPv4 DNS name. You can find this information in the EC2 instance details in the AWS Console.
Update the Inbound Rules to allow SSH (port 22) access.
For best security practices, restrict access to your current public IP address by specifying it with /32 CIDR notation.
Finally we are ready to set up SSH tunneling!
Once verified, create an SSH tunnel using the following command:
ssh -i /path/to/private-key.pem -L 5984:localhost:5984 bitnami@your-ec2-public-ipReplace /path/to/private-key.pem with the path to your private SSH key, and your-ec2-public-ip with the public IP address of your EC2 instance.
Before accessing CouchDB:
Using the existing SSH session, run the following command to retrieve your CouchDB credentials:
sudo cat /home/bitnami/bitnami_credentialsTake note of the username and password displayed.
Now visit the URL below:
You will be prompted to provide a login, enter the username and password you retrieved earlier.
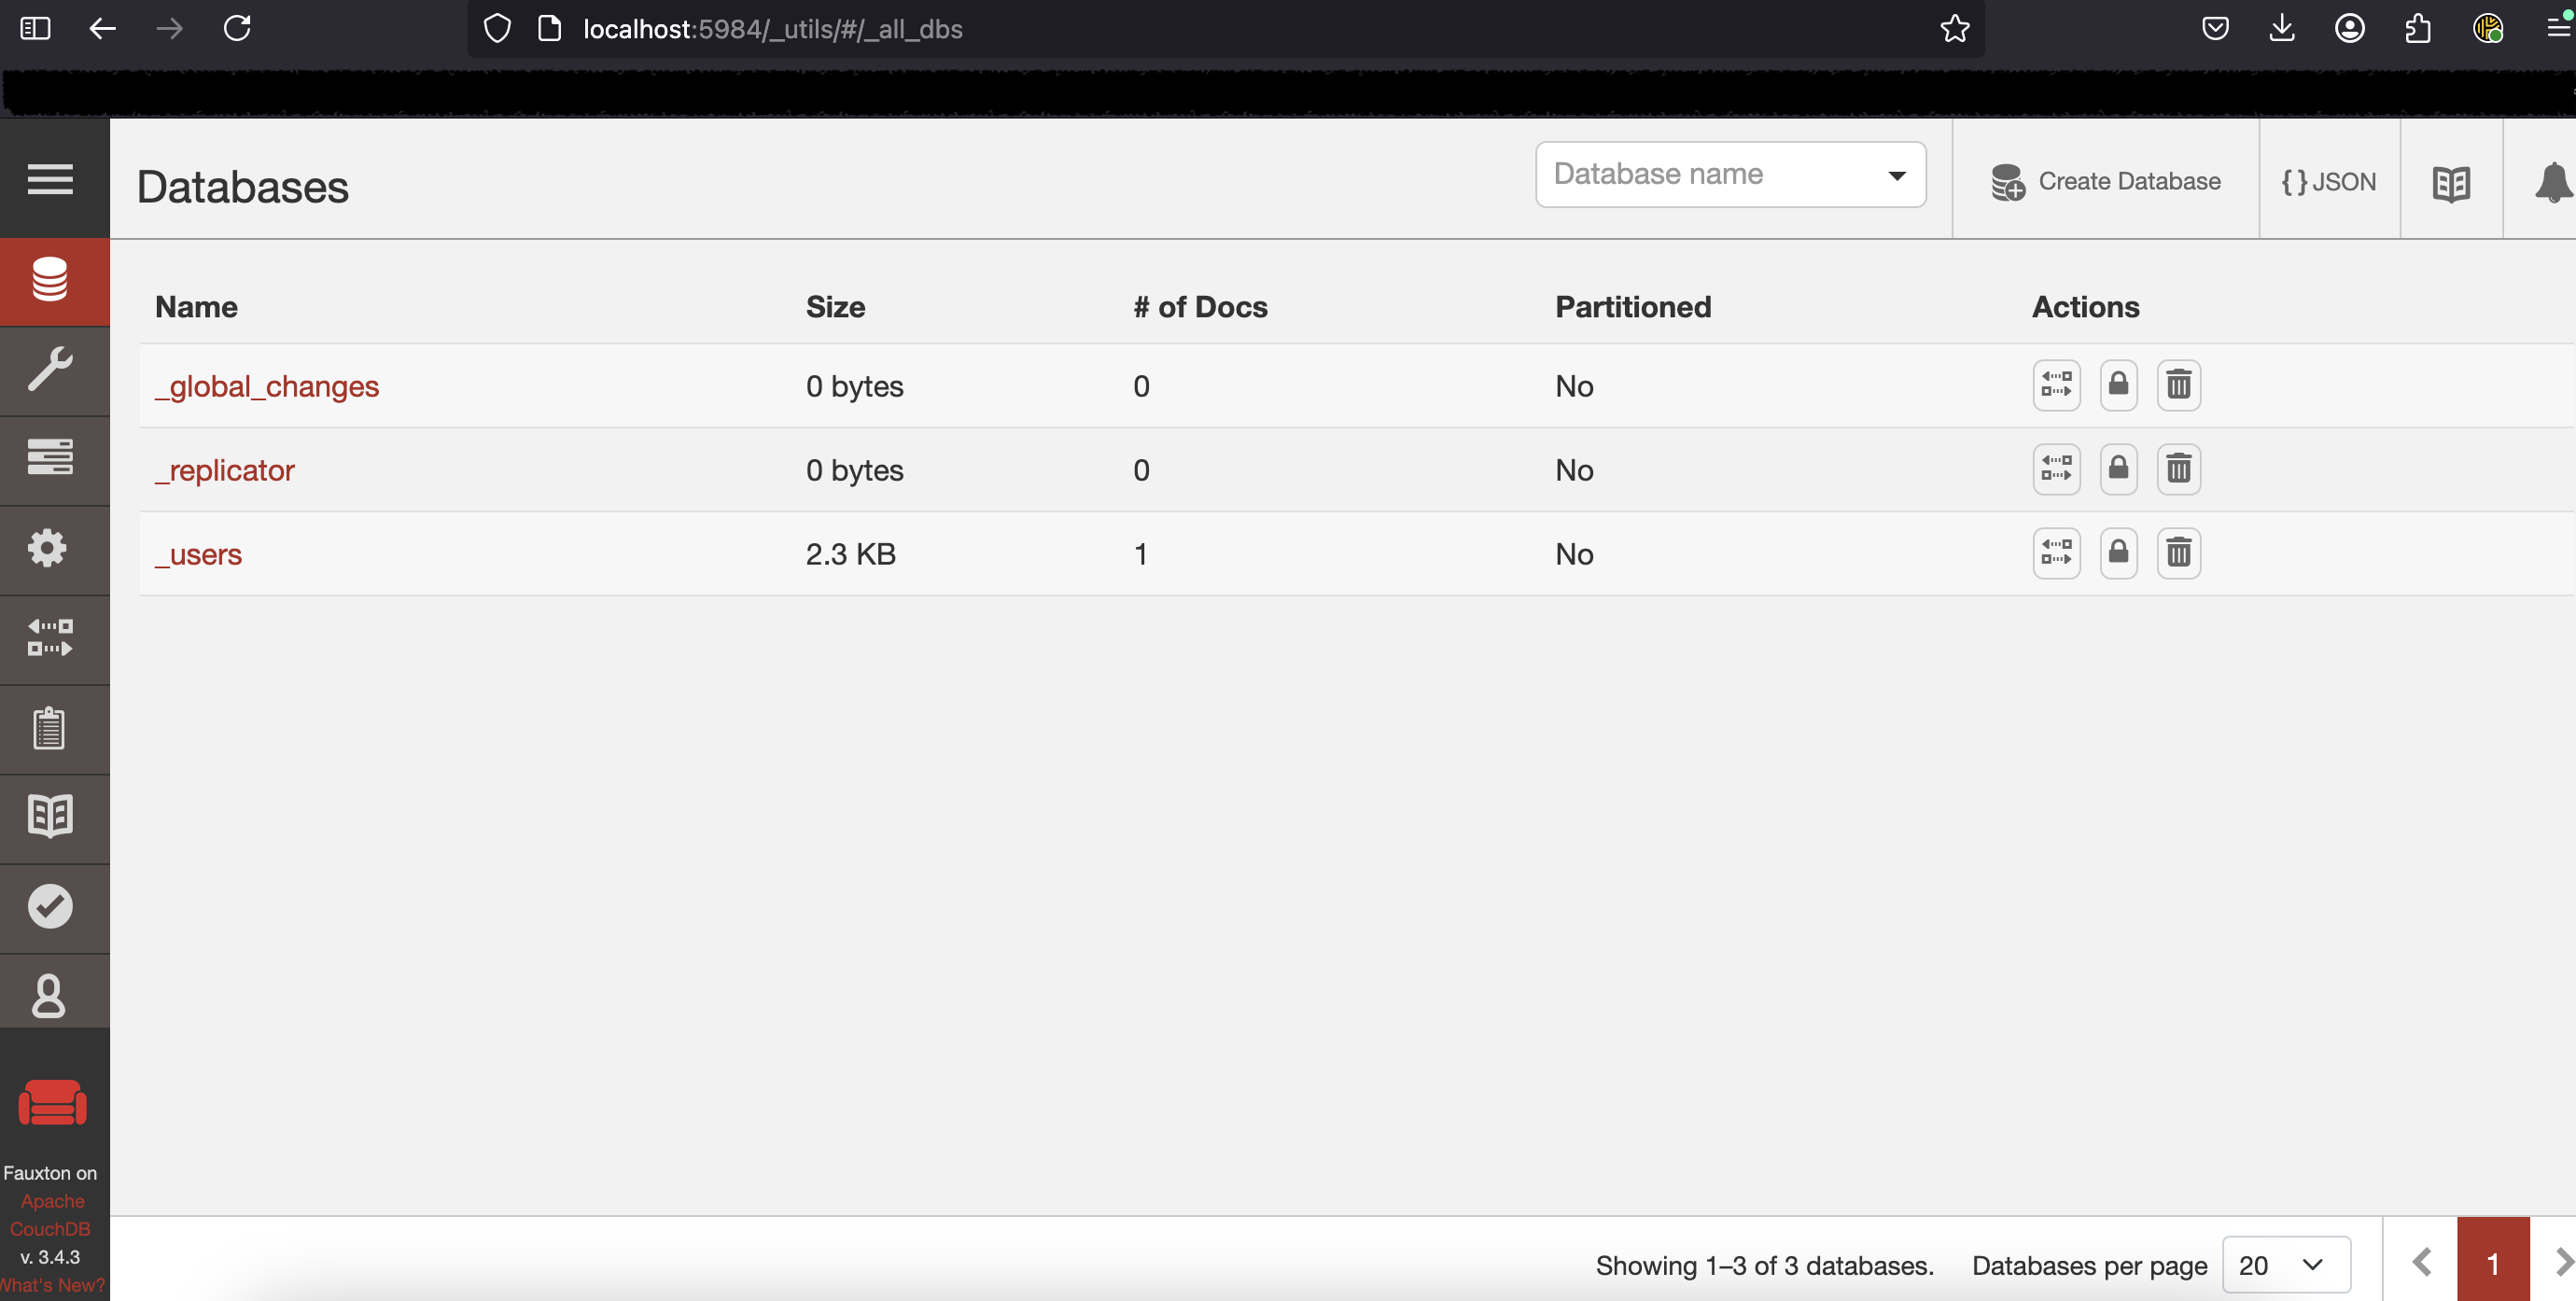
And there you have it!
You are now accessing the remote CouchDB server's admin interface through your localhost.
This approach offers a much better experience compared to using RDP and interacting with a remote-controlled UI.
Thanks for reading!
Now we have a CouchDB instance running, but there is not much we can do with it yet.
What if there were an application that allows you to connect to any data source you choose, giving you full access and control over your data while still taking advantage of the application's full feature set? Jargon Vault does exactly that.
You can connect your CouchDB instance to Jargon Vault and utilize all of its features while maintaining complete ownership and control over your data.
Check out Jargon Vault here